Moonlight Micro-Farm Helps People Eat Well
Despite a Tough Economy
As I looked at various goodies on Etsy I came across some listings for seeds which could be sprouted for food, and this idea started to look more and more attractive and viable to me the more I looked into it. A search on Youtube yielded alot of videos made by people who were benefitting greatly from this approach; people even in areas of the country where fresh vegetables were unavailable in their local grocery stores during Winter months! Did you know that sprouts pack about 10 times the nutrition of their resulting fully-grown plants? They are full of anti-oxidants and natural fiber!
I convoed Chandra Hartman at Moonlight Micro-Farm, an Etsy shop offering such harvestable seeds and asked her how much seed I'd need to last me the summer and she helped me to come up with a nice array of varieties that would last me, and I'm so glad I did because even after a few weeks the box of seeds has already paid for itself! Rather than needing to go to the grocery store each week to replace my perishable vegetation I have only had to go maybe twice, and that has been mainly to replace other foods like dairy and meat products!
All Chandra's seeds are grown organically and in addition to the sprouting varieties she also offers everything from mini Watermelon to Artichoke and Brussels Sprout seeds in addition to the more common vegetable and herb seeds.
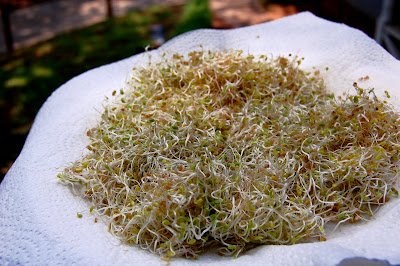
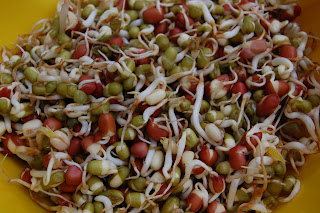
I bought the Crimson and Clover , Mungzuki , and the Organic Black Sunflower Seeds and I created some recipes especially for each type of sprout.
The Mungzuki
and Crimson and Clover
sprouted easily without incident, but the black sunflower seeds were a little more finnicky.
After soaking 8-12 hours, then rinsing the seeds twice a day for 3-4 days in a row I got this jarfull of big, fat, juicy sprouts!
Please do try this at home;
You'll need:
* A flat container; preferably with small drainage holes in the bottom
* Something to place underneath for excess water to drain into
* A spray bottle
* Potting soil
* A cover (optional but not absolutely necessary)
I got a flat at Walmart but they didn't have the kind I really needed with small drain holes, so I had to get the one that included peat pellets with a little insert that had square nitches and holes about the size of a nickel.
I removed the peat pellets and decided to try to put a layer of packing peanuts in the bottom of the tray so that dirt wouldn't just fall through the holes.
Then I put a 1 inch layer of Jiffy brand seed-starting potting soil in the tray on top of the packing peanuts.
Then I poured out the sunflower sprouts in the tray on top of the dirt, spread them out evenly,
and then covered them with about 1/4 inch more of dirt. I sprayed the dirt with the spray bottle so that all the dirt was moist but not too saturated.
Then I covered it and put it in the bathroom in the dark to let the seeds form roots and start to grow.
Well the planting results of my first batch were not as good as they were when the seeds were in the jar.
I think it was the packing peanuts or else they were too crowded. These didn't ultimately make it. I noticed that some people who had videos on Youtube just planted theirs without drainage and theirs came out just fine, so this time I planted a smaller batch in a glass container. Here were the results step by step;
Day 3
Day 4
Day 5
Day 6
At day 6 I noticed that the sprouts had two leaves but were only 2 inches long and they were beginning to go in wild directions rather than growing upright. I figured I better cut them and eat them the next day for lunch jut in case they might be in the dirt too long. This seemed to help and as a result the ones that were not as far along that had been lying down grew longer and more upright again! It was like when you prune rose bushes or trees. It seemed to free them up so that they could make full use of their resources.
Day 8
Some of the seed casings are stubborn and don't want to come off by themselves, so after this picture was taken I picked off the persistant ones.
Meanwhile as I'm waiting to get another batch of edible sprouts from this container I started another one. It's a good idea to time them so that you can have sprouts ready to eat at all times by staggering the preparation and planting.
Stay tuned for Part Two of this story where I'll show you some of the delicious meals I prepared with my sprouts!
In the meantime, grow some yourself and see just how delicious home-grown can be!
To get started on your own indoor micro-gardening adventure go to Moonlight Micro-Farm now!


No comments:
Post a Comment